To Place the Steel Deck Roof
-
Select
 (Place Deck).
The Place Deck dialog appears.
- In the General section, set the following:
- In the Steel Deck section, do the following:
- Selecting the Deck 6 profile updates the information in the Steel Deck Properties settings.
-
Click
Place.
The prompt Pick first Structural Member appears on the Status bar.
- Snap to the top of the column at A1, and accept it with a data point to establish the first corner of the steel deck.
- Snap to the top of the column at C1, and accept it with a data point. The prompt Pick next Structural Member. Reset to accept place boundary appears on the Status bar.
- Snap to the top of the column at C3, and accept it with a data point. The prompt Pick next Structural Member. Reset to accept place boundary appears on the Status bar.
- Snap to the top of the column at A3, and accept it with a data point. The prompt Pick next Structural Member. Reset to accept place boundary appears on the Status bar.
- Now have completed selecting Structural members. Reset (right mouse click) to continue. The prompt Place fist point to define deck extrude direction appears on the Status bar.
- Enter a data point to establish the first reference point of the extrude direction for the steel decking. The prompt Place the next point to accept appears on the Status bar.
- Move the cursor away from the first point, in the direction positive X direction, and enter a data point. The deck is placed, and the Place Deck tool returns to the first prompt given Pick first Structural Member.
-
With the
Place Deck tool
still active, Place another steel roof deck using the same settings as before:
- Snap to the endpoint of the of girder connected to the column at C1, and accept it with a data point to establish the first corner of the steel deck.
- Snap to the endpoint of the column at D1, and accept it with a data point.
- Snap to the endpoint of the column at D3, and accept it with a data point.
- Snap to the endpoint of the of girder connected to the column at C3, and accept it with a data point.
- Reset and enter two data points to establish the steel decking extrude direction. Use the same X direction for the second extrude direction data point.
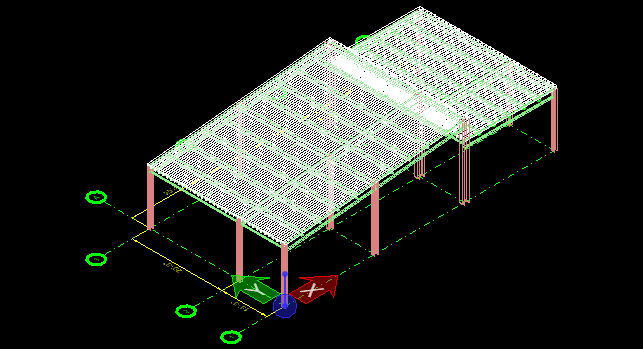
The steel roof decks are now complete.
- (Optional)
Select
Commit (Changes) utility to commit your
changes to design history
Enter your comments (such as Added bar
joists) in the Commit Changes dialog, and click OK.
You can alway check the Design History for your latest comments.